Go to https://github.com/nus-ncl/Client to git or download the tool NCLient.
Refer to README https://github.com/nus-ncl/Client#getting-started to learn how to get started.
To get the Node/Stack information , goto “Experiment” page http://ncl.sg/experiments and press on the name of experiment. Then you will find the detail page of an experiment.
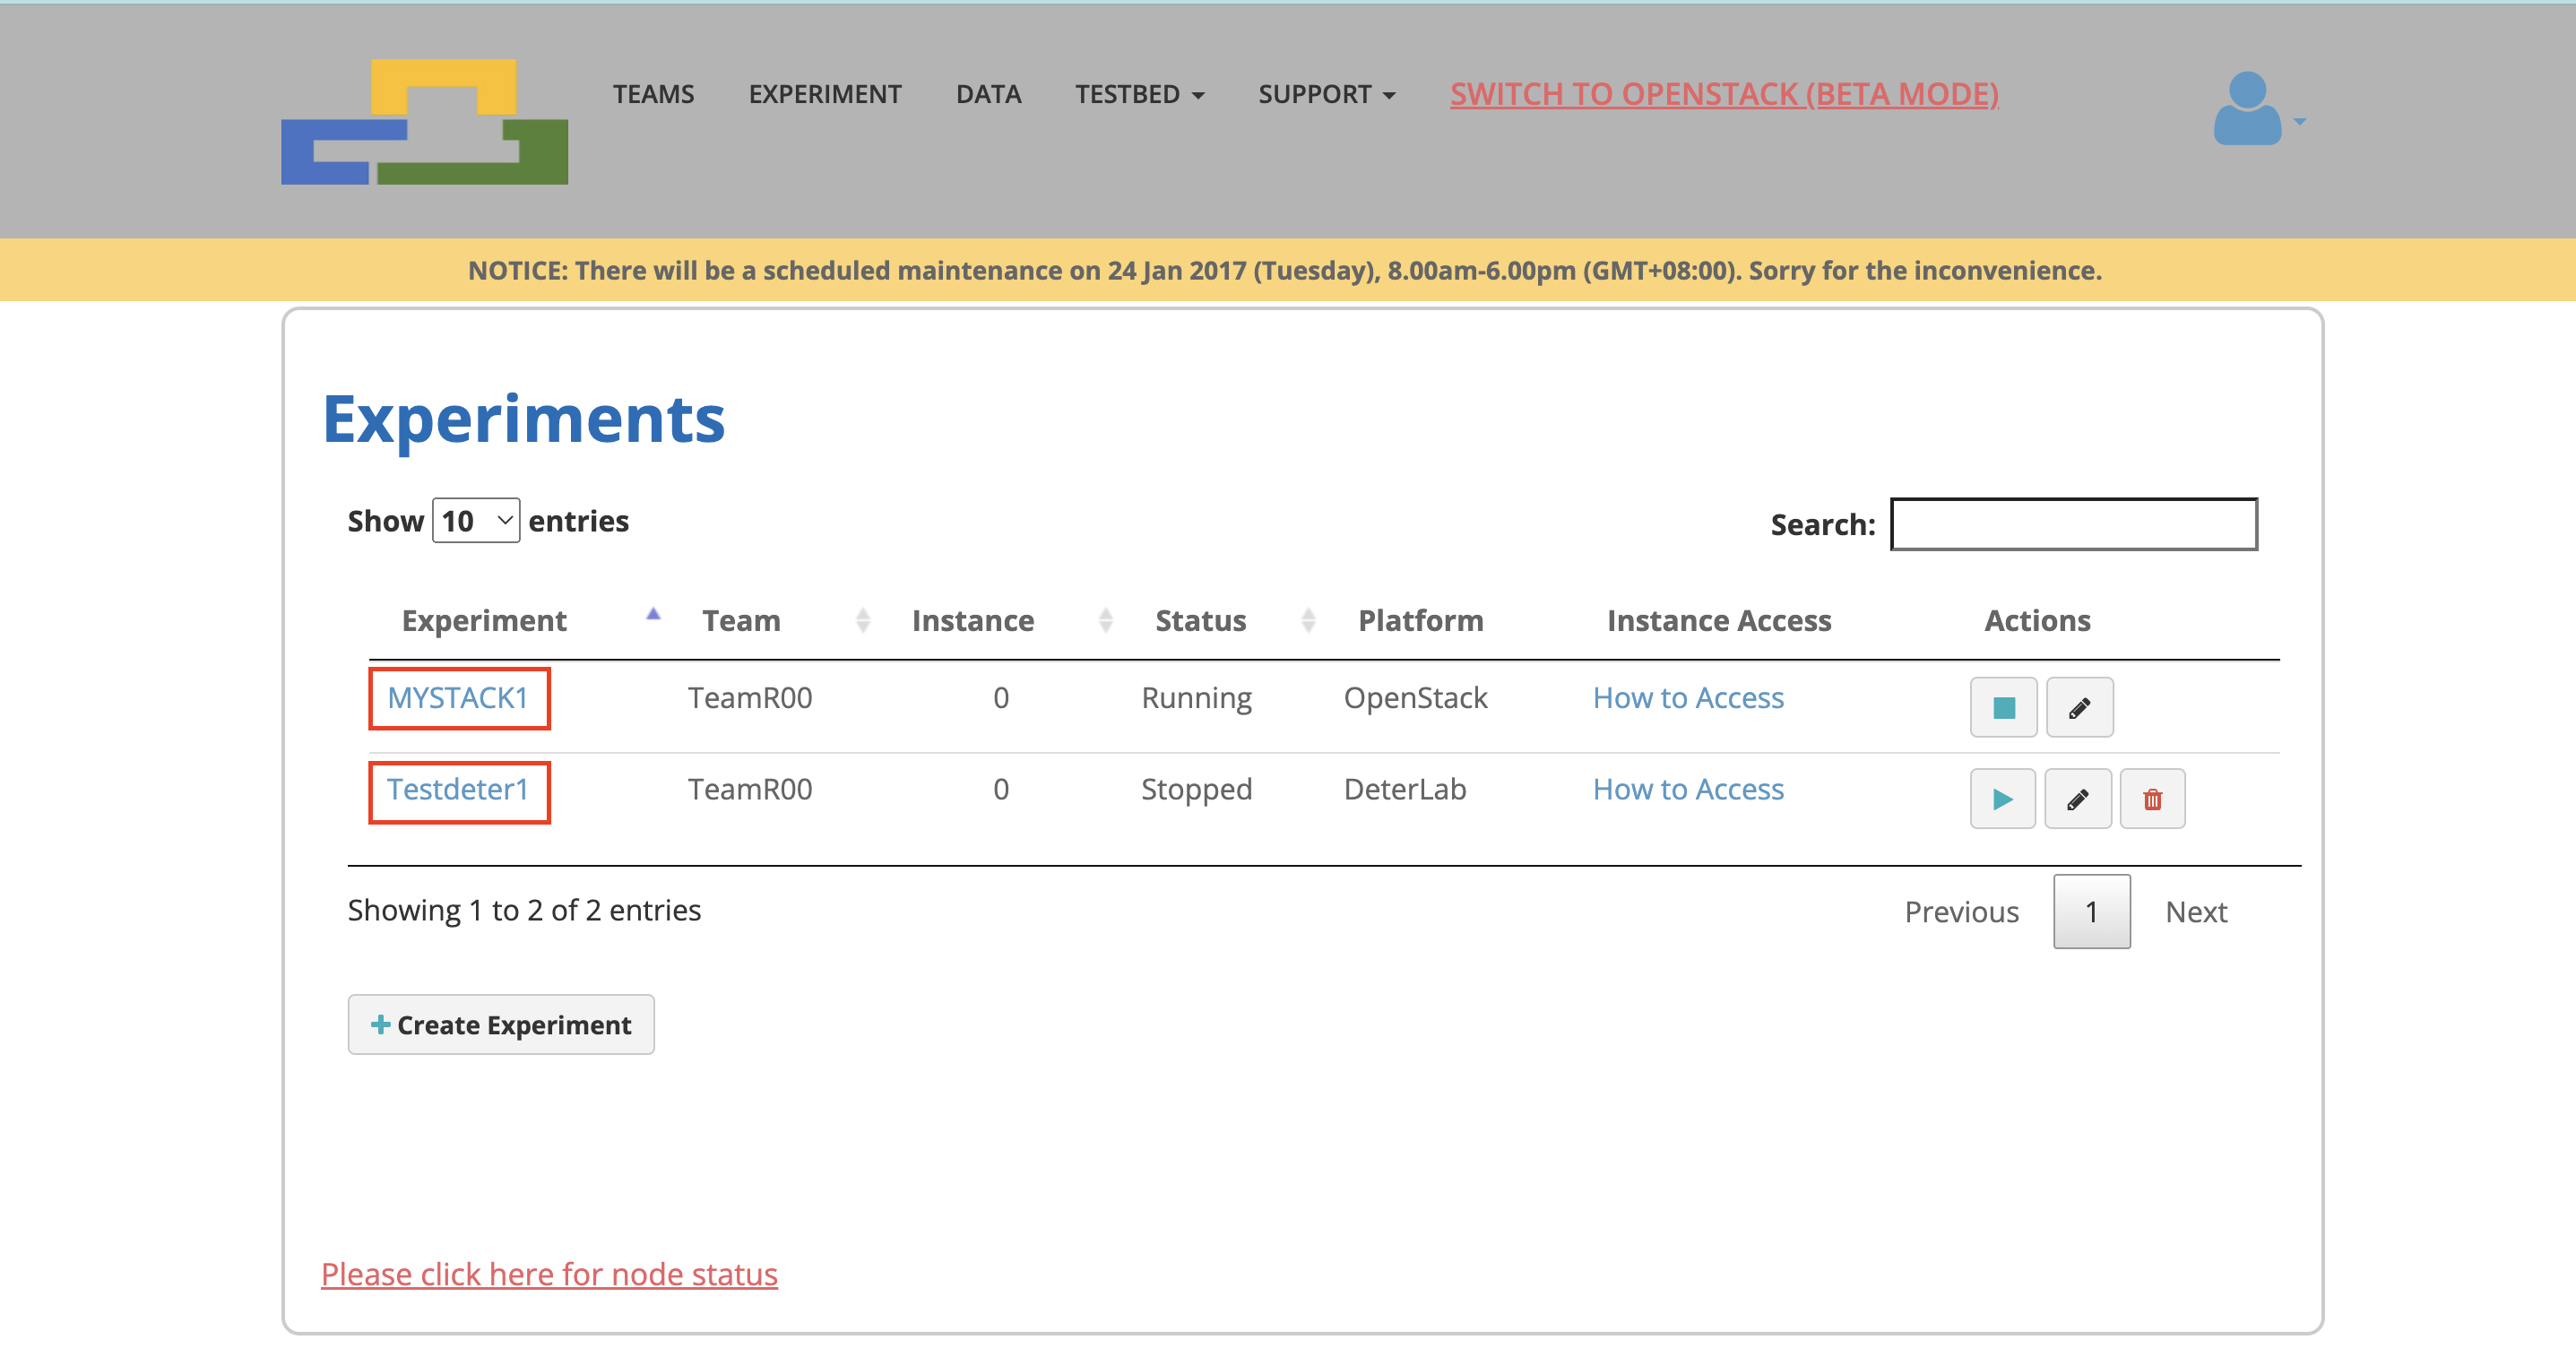
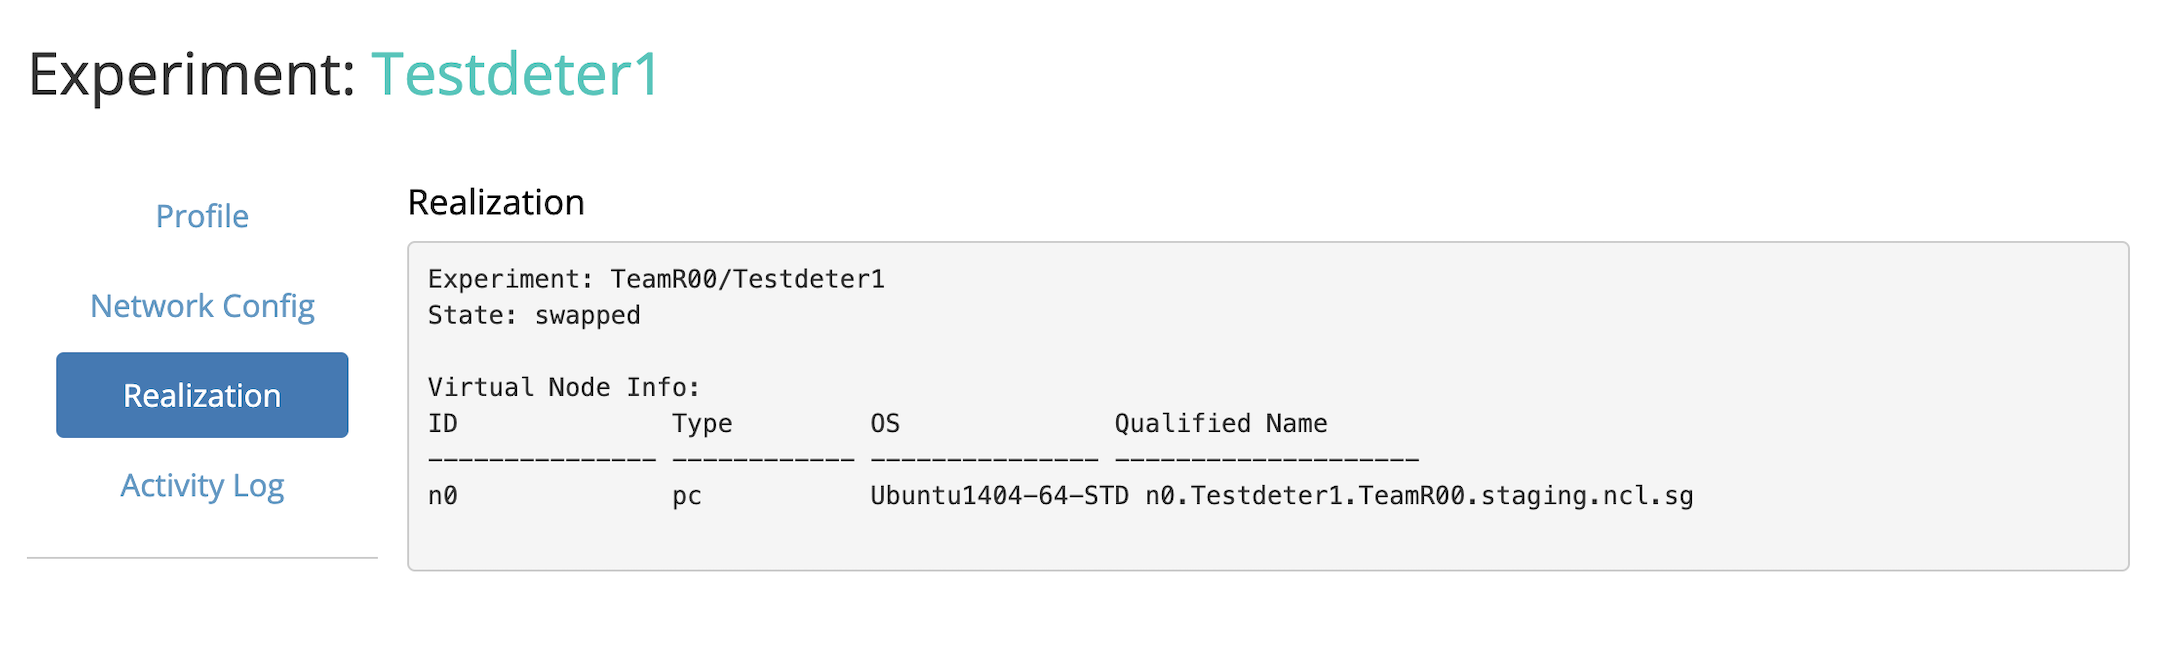
Click on the “Realization” tab on navigation, will show the node/stack information of specific experiment.
Go to client_files folder at root directory, to compose your client file according to your metadata of the instance, based on our provided templates. (Deter or OpenStack)
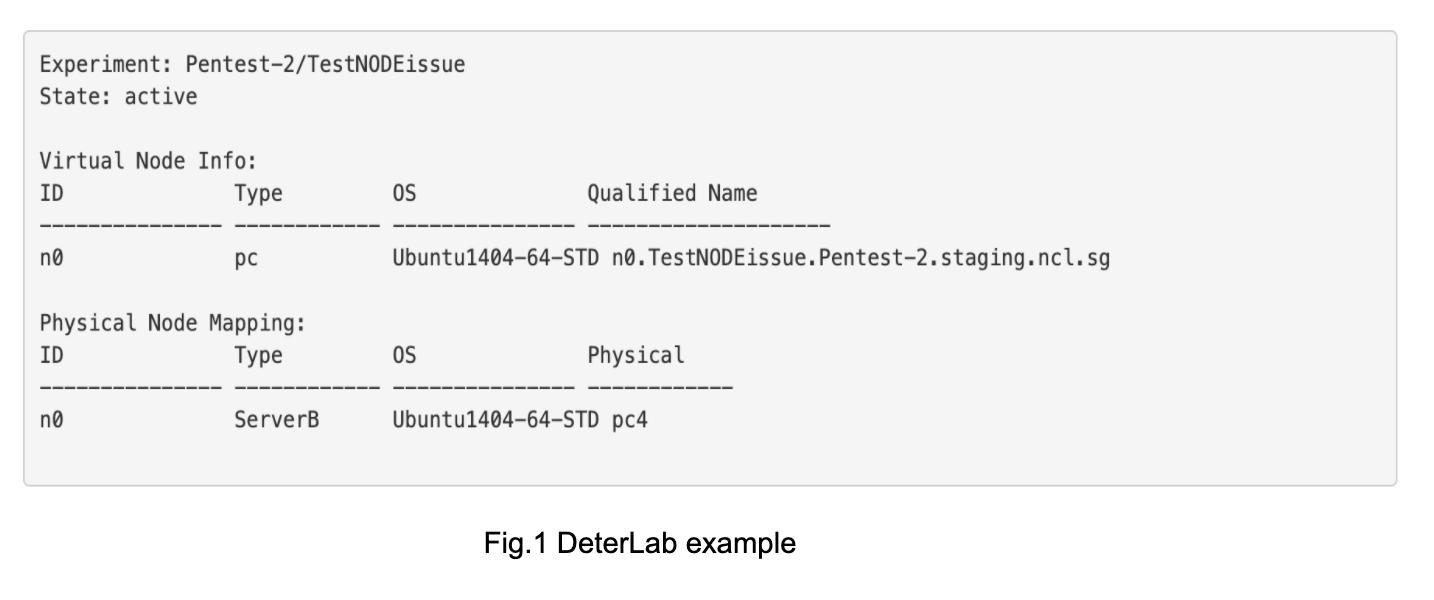
For every single node, create a <Node></Node> tab under the <NODES></NODES> tab and then replace 'name',
'ExperimentName','TeamName' and 'vncport'.
E.g. for the example of Fig1.
name = n0
ExperimentName = Pentest-2
TeamName = TestNODEissue
vncport = 5901
for n0 access.
If you have more than one node,it works the same except for ‘name’ = n0 for node n0.
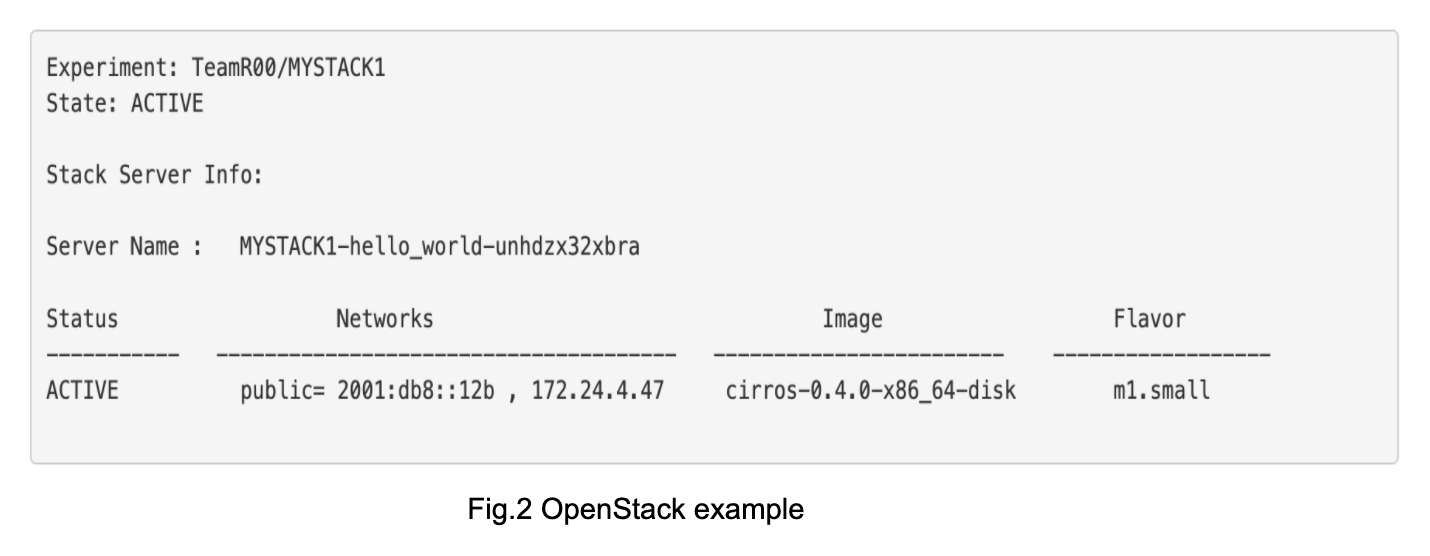
For every single instance, create a <Machine> </Machine> tab under
the <VM></VM> tab and then replace ‘name’, ‘Project’,
‘TeamName’ , ‘Domain’, ‘username’, ‘password’, ‘vncport’ and ‘IP’ of provider adapter.
E.g. for the example of Fig2.
name = MYSTACK1-hello_world-unhdzx32xbra
Project = ARPDemo
Domain = Default
username = <ssh account of the instance>
password = <ssh password of the instance>
vncport = 5901
for MYSTACK1 access.